
- 1 cup graham cracker crumbs
- 3 tablespoons melted butter
- 2 tablespoons granulated sugar
For the cheesecake filling
- 16 ounces cream cheese, softened (full‑fat for best texture)
- ½ cup granulated sugar
- 1 teaspoon vanilla extract
- 2 large eggs
- ¼ cup sour cream
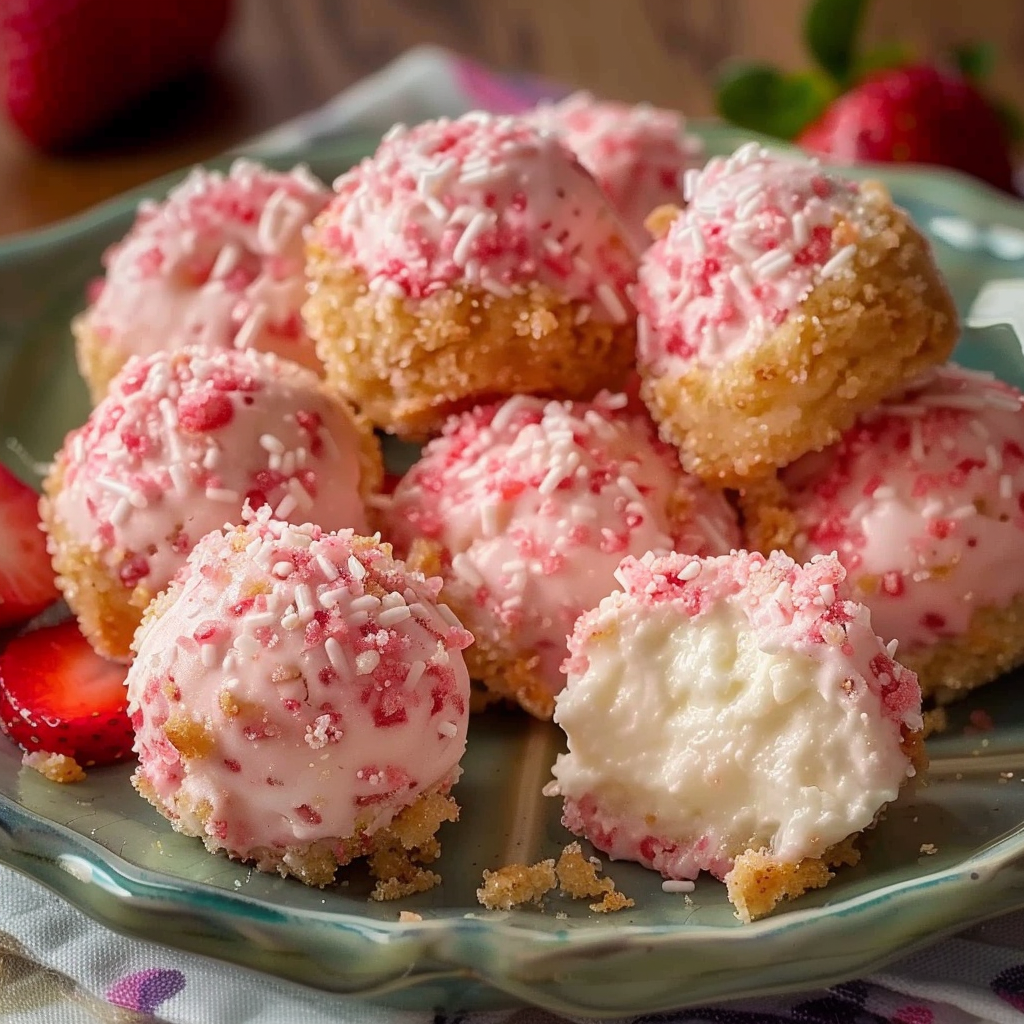
- ½ cup strawberry preserves or strawberry puree
For the strawberry crunch topping
- ½ cup freeze‑dried strawberries
- 12 golden sandwich cookies (such as Golden Oreos)
- 2 tablespoons melted butter
Step-by-Step Instructions
1. Prep the pan and oven
- Preheat the oven to 325°F (165°C).
- Line a mini muffin pan with paper liners, or lightly grease each cavity if not using liners. Liners make it much easier to lift out and serve the bites cleanly.
2. Make the graham cracker crust
- In a small bowl, combine the graham cracker crumbs, melted butter, and granulated sugar. Stir until the crumbs are evenly moistened and look like wet sand.
- Spoon a small amount of crumb mixture into the bottom of each mini muffin cup—about 1–2 teaspoons, depending on the size of your pan.
- Use the back of a small spoon, your fingers, or a flat‑bottomed tool to press the crumbs firmly into an even layer, forming a compact crust.
3. Mix the cheesecake filling
- In a mixing bowl, beat the softened cream cheese until completely smooth and creamy, scraping down the sides as needed so there are no lumps.
- Add the ½ cup granulated sugar and beat again until the mixture is fluffy and well combined.
- Mix in the vanilla extract.
- Add the eggs one at a time, beating on low speed just until each is incorporated. Avoid over‑mixing at this stage to reduce the chance of cracks.
- Blend in the sour cream until the filling is smooth and silky.
4. Add the strawberry swirl
- Gently warm the strawberry preserves or puree if needed so it’s easy to drizzle.
- You can swirl in the strawberry in two ways:
- Bowl swirl: Pour the preserves into the cheesecake batter and use a knife or spatula to gently fold and swirl it through without fully mixing, leaving visible streaks.
- Cup swirl: Alternatively, spoon plain cheesecake batter into each crust, then add a small dollop of strawberry preserves on top of each and swirl with a toothpick in the muffin cup.
Either way, aim for a marbled effect rather than fully blended pink batter.
5. Fill and bake the bites
- Spoon the cheesecake mixture over the prepared crusts, filling each mini muffin cup almost to the top. Leave a small space to prevent overflow as they bake.
- Bake in the preheated 325°F (165°C) oven for 15–18 minutes. The centers should look set but still slightly jiggly when you gently shake the pan; the tops should not be browned.
- Remove the pan from the oven and let the cheesecake bites cool in the pan at room temperature for about 20–30 minutes.
6. Chill thoroughly
- Once mostly cooled, transfer the pan to the refrigerator and chill the bites for at least 1 hour, or until fully set and cold. Proper chilling firms the filling and gives that classic creamy cheesecake texture.
Making the Strawberry Crunch Topping
7. Crush the strawberries and cookies
- While the cheesecake bites chill, place the freeze‑dried strawberries and golden sandwich cookies into a food processor. Pulse in short bursts until they form coarse crumbs. You want small, even pieces rather than a fine powder, so stop before everything turns to dust.
- If you don’t have a food processor, place strawberries and cookies in a zip‑top bag and crush with a rolling pin.
8. Bind with melted butter
- Transfer the crumb mixture to a bowl. Pour in the melted butter and stir until all the crumbs are lightly moistened and clump slightly when pressed. The butter helps the crunch topping adhere to the chilled cheesecake.
Finishing the Cheesecake Bites
9. Add the strawberry crunch
- Once the cheesecake bites are fully chilled and firm, remove them from the pan.
- Spoon a small mound of the strawberry crunch mixture onto the top of each bite, pressing gently so it sticks to the cheesecake surface. You can cover just the center or the entire top, depending on how crunchy you like them.
10. Serve
- Arrange the finished bites on a platter and keep them chilled until serving time. Serve straight from the refrigerator for the best texture and cleanest bites.
Continue to the next page to reveal more tips and tricks