
Ingredients I use
Dry ingredients
- 2 cups all-purpose flour
- 1/4 cup granulated sugar
- 1 tablespoon baking powder
- 1/2 teaspoon salt
Wet ingredients
- 1/2 cup cold unsalted butter, cut into cubes
- 1/2 cup sour cream
- 1 large egg
- 1–2 tablespoons orange zest (zest of 1 large orange)
- 1 teaspoon vanilla extract
- 2–3 tablespoons orange juice (as needed, just enough to bring the dough together)
Add‑ins
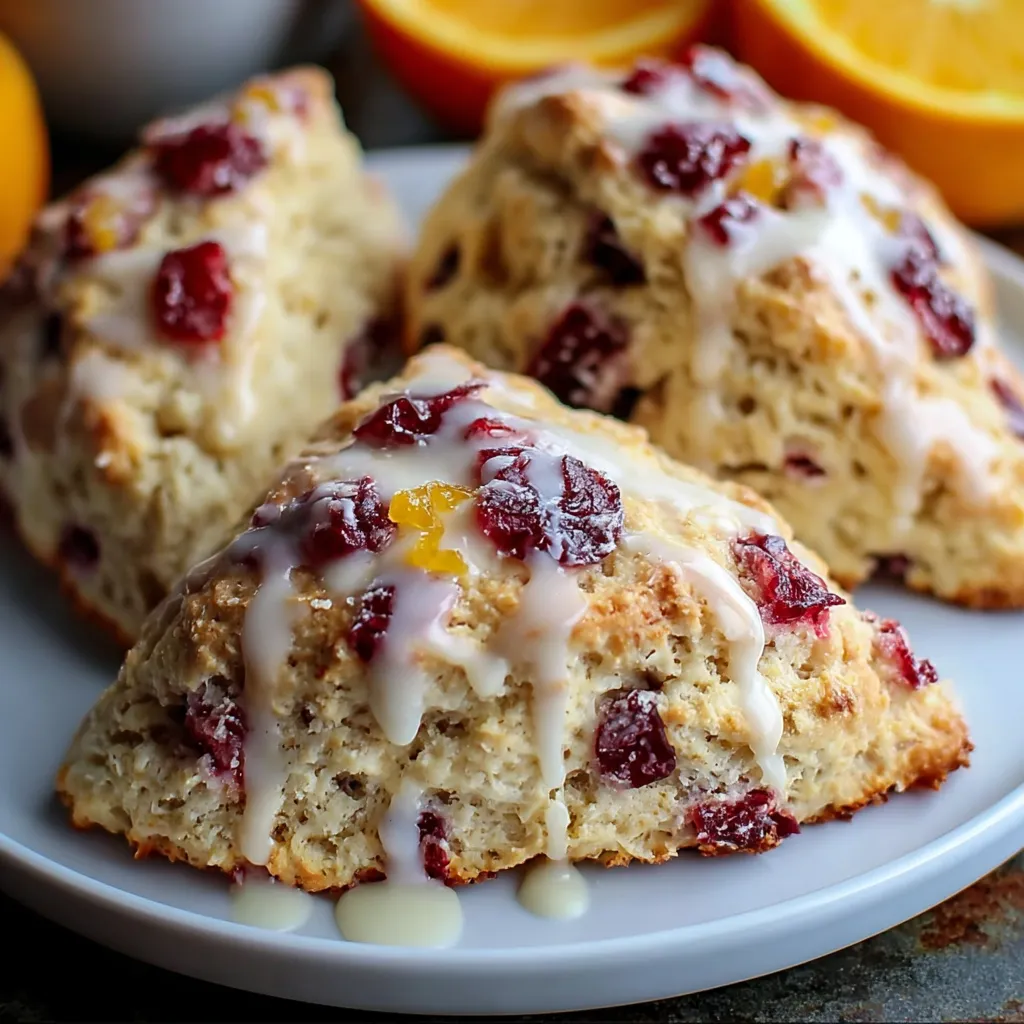
- 1 cup fresh or frozen cranberries (or about 3/4 cup dried cranberries)
Optional topping
- 1–2 tablespoons coarse sugar, for sprinkling
Simple orange glaze (optional)
- 1/2 cup powdered sugar
- 1–2 teaspoons orange juice (enough to make a drizzleable glaze)
I keep the butter as cold as possible and cube it right before cutting it into the dry ingredients so it doesn’t soften in my hands. Using sour cream instead of cream alone gives the scones a tender crumb and keeps them moist for longer than some traditional recipes.
How I make Cranberry Orange Sour Cream Scones
I preheat and prepare the pan
I preheat my oven to 400°F (200°C) and line a baking sheet with parchment paper so the scones don’t stick and the bottoms brown gently. I set the pan aside while I mix the dough.
I mix the dry ingredients and cut in the butter
In a large mixing bowl, I whisk together the flour, granulated sugar, baking powder, and salt until everything is evenly combined. I add the cold, cubed unsalted butter to the bowl and use a pastry cutter, two knives, or my fingertips to work the butter into the flour mixture. I stop when the mixture looks like coarse crumbs with pea‑sized bits of butter scattered throughout. I try to work quickly so the butter stays cold; those little chunks will create steam pockets in the oven and give the scones their flakiness.
I whisk the wet ingredients
In a separate small bowl, I whisk together the sour cream, egg, orange zest, and vanilla extract until the mixture is smooth and uniform. This becomes my wet base and provides both moisture and flavor.
I bring the dough together and add cranberries
I pour the wet mixture over the dry ingredients and gently stir with a spatula or wooden spoon just until the dough starts to clump and come together. If the mixture still looks dry with lots of loose flour at the bottom, I splash in orange juice 1 tablespoon at a time, mixing lightly between additions, until the dough holds together when I press it with my hands. I stop as soon as it can form a rough mass; overmixing here can make the scones tough.
When the dough is almost there, I gently fold in the cranberries—fresh, frozen, or dried—just until they’re evenly distributed. If I’m using frozen cranberries, I add them straight from the freezer and work efficiently so they don’t chill the dough too much or start to bleed excessive juice.
I shape, cut, and bake the scones
I turn the dough out onto a lightly floured surface and gather it together with my hands. I pat and gently press it into a round disk about 1 inch (2.5 cm) thick, trying not to knead or overwork it; a little roughness and visible butter bits are good signs. Using a sharp knife or bench scraper, I cut the disk into 8 equal wedges, like cutting a pizza.
I transfer the wedges to the prepared baking sheet, spacing them a few inches apart to give them room to rise and spread slightly. If I’m using coarse sugar, I sprinkle it over the tops for extra crunch and sparkle. I bake the scones in the preheated oven for about 15–18 minutes, or until they’re puffed and lightly golden around the edges and on top.
When they’re done, I let the scones cool on the baking sheet for 5–10 minutes so they set up a bit before I move them.
I glaze and serve
If I’m making the orange glaze, I stir together the powdered sugar and enough orange juice to make a smooth, drizzleable consistency. I drizzle the glaze over the warm or cooled scones in thin lines or a zigzag pattern and let it set briefly. I like to serve the scones slightly warm or at room temperature, with the glaze just firm enough that it doesn’t make a mess when I pick one up.