
Ingredients for the Graham Cracker Crust
For the crust, you’ll need:
- 2 cups graham cracker crumbs – Finely crushed crackers form the base. You can pulse whole graham crackers in a food processor or use pre‑crushed crumbs for convenience.
- ¼ cup granulated sugar – Sweetens the crust and helps it set, working with the butter to form a cohesive layer.
- ½ cup unsalted butter, melted – Binds the crumbs together and adds rich, buttery flavor. Using unsalted butter lets you control the overall salt level in the dessert.
This trio of ingredients is classic for cheesecakes, providing a sweet, slightly sandy base that complements the creamy filling without overwhelming it. The proportions here are just right for a standard 9‑inch springform pan, giving you a crust thick enough to be satisfying but not so thick that it dominates each bite.
How to Make the Graham Cracker Crust
Mixing the crumbs and sugar
I start by preparing the graham cracker crumbs. If I’m crushing whole crackers, I either pulse them in a food processor or place them in a zip‑top bag and roll them with a rolling pin until they’re very fine. Then I measure 2 cups of crumbs into a mixing bowl and add the ¼ cup of granulated sugar. I whisk or stir these together so the sugar is evenly distributed through the crumbs.
This step matters more than it seems. Even sugar distribution helps the crust taste consistent from edge to center, and it also helps the butter coat everything properly. When the crust bakes (or chills, if using a no‑bake method), the sugar will help the crumbs firm up into a sliceable layer.
Adding the melted butter
Next, I pour in the ½ cup of melted unsalted butter. The butter should be fully melted but not scorching hot; slightly cooled is ideal. I drizzle it slowly over the crumbs while stirring with a fork or spatula, making sure each bit of crumb gets some butter. The mixture should start to look like damp sand.
Once everything is combined, I test the texture by pinching a bit of the mixture between my fingers. It should hold together in a clump without crumbling apart immediately. If it seems too dry, I add a teaspoon or two more melted butter. If it’s too wet or greasy, I sprinkle in a small amount of additional crumbs. The goal is a mixture that will press firmly into the pan and hold its shape when sliced later.
Pressing the crust into the pan
When the crumb mixture is ready, I pour it into a 9‑inch springform pan. Using clean hands, the back of a spoon, or the flat bottom of a measuring cup, I press the crumbs firmly into an even layer across the bottom of the pan. I like to push a bit of the mixture up the sides, creating a low wall about 1 to 1½ inches high. This helps contain the cheesecake filling and gives every slice that nice crust edge.
Firm packing is key. If the crumbs are too loose, the crust will crumble when sliced and won’t support the creamy filling well. I take my time smoothing and pressing, making sure there are no thin spots.
Par‑baking or chilling the crust
Depending on whether the final cheesecake will be baked or no‑bake, I either bake or chill the crust:
- For a baked cheesecake, I preheat the oven to 325–350°F (160–175°C) and bake the crust for about 8–10 minutes, just until it’s lightly fragrant and starting to set. Then I cool it slightly before adding the filling.
- For a no‑bake cheesecake, I simply chill the crust in the refrigerator for at least 20–30 minutes so the butter firms up and the crumbs hold together.
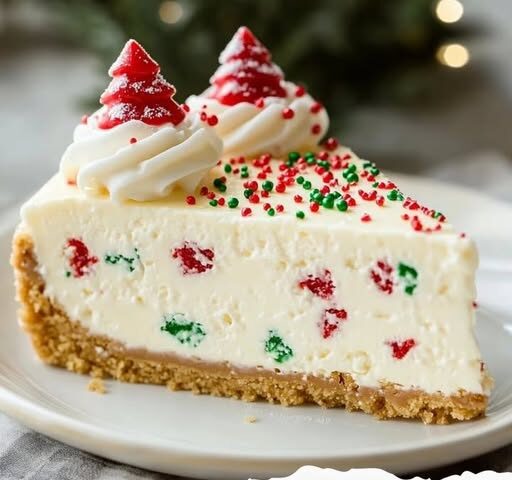
Either way, this step transforms the loose mixture into a solid, sliceable foundation. A properly set crust makes it much easier to cut clean slices of Christmas Little Debbie Tree Cheesecake that hold together from plate to fork.
Continue to the next page to reveal more tips and tricks