
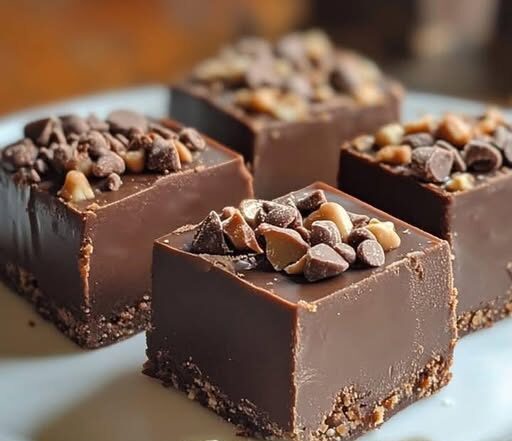
Old Fashioned Hershey Cocoa Fudge is the classic, sliceable stovetop fudge many people remember from old Hershey’s tins and family holiday trays: no marshmallows, no sweetened condensed milk, just sugar, cocoa, milk, butter, and vanilla cooked to soft‑ball stage and beaten until thick and satiny. This style of fudge has a firm bite that melts on the tongue and a deep cocoa flavor that feels nostalgic and homey, especially when cut into neat squares and piled onto a plate like in your photo.
Ingredients
These amounts make an 8‑inch square pan of fudge, about 36 small squares.
- 2 cups granulated sugar
- 1/2 cup unsweetened Hershey cocoa powder
- 1/8 teaspoon salt
- 3/4 cup whole milk (or 2%, but whole gives a creamier texture)
- 4 tablespoons (1/4 cup) unsalted butter, cut into pieces
- 1 teaspoon vanilla extract
- Optional: 1/2 cup chopped walnuts or pecans, or a handful of chocolate chips for sprinkling on top
Using a good unsweetened cocoa like Hershey’s ensures the fudge has that characteristic old‑school flavor and dark color without relying on chocolate chips or corn syrup.
Step‑by‑Step Instructions
This fudge is all about temperature and timing. A candy thermometer makes it easier, but you can also use the traditional cold‑water “soft‑ball” test.
1. Prepare the pan
- Line an 8×8‑inch square pan with foil or parchment, letting the edges overhang to form handles.
- Lightly butter the lining so the fudge releases easily once set.
Having the pan ready before you start cooking is important because the fudge moves quickly once it reaches temperature and is beaten.
2. Combine dry ingredients and milk
- In a heavy 2‑ to 3‑quart saucepan, whisk together the sugar, cocoa powder, and salt until no cocoa lumps remain.
- Pour in the milk and stir until everything is well combined and smooth.
Mixing the cocoa with sugar while still dry helps it disperse evenly and prevents stubborn lumps in the cooked mixture.
3. Cook to soft‑ball stage
- Place the saucepan over medium heat.
- Stir constantly as the mixture warms and comes to a full bubbling boil; this usually takes about 4–5 minutes.
- Once it reaches a steady boil, stop stirring. Clip on a candy thermometer, if using, and let the mixture cook undisturbed until it reaches 234–240°F, the soft‑ball stage.
- If you don’t have a thermometer, drip a small amount into a cup of very cold water; it should form a soft, pliable ball that flattens when removed from the water.
Not stirring after the boil helps prevent sugar crystals forming on the sides of the pan, which can cause grainy fudge.
4. Cool with butter and vanilla (do not stir yet)
- When the fudge reaches soft‑ball stage, remove the pan from the heat.
- Add the butter pieces and vanilla extract on top of the hot mixture, but do not stir them in yet.
- Set the pan in a sink or larger pan with a couple of inches of very cold water (you can add a few ice cubes) and let the mixture cool undisturbed until it’s lukewarm—around 110°F—or just slightly warmer than room temperature.
Letting the mixture cool without stirring allows large sugar crystals to settle and creates a smoother texture when you do start beating.
5. Beat until thick and satiny
- Remove the pan from the cold‑water bath.
- Using a sturdy wooden spoon, begin stirring the mixture, scraping the bottom and sides as you go to incorporate the melted butter and vanilla.
- Continue beating steadily; the fudge will go from glossy and dark to thicker and more matte with a satiny sheen. This can take 5–10 minutes by hand.
- If adding nuts, fold them in once the fudge starts to lose its shine and thickens to the consistency of soft peanut butter.
The beating stage is where the magic happens: controlled crystallization gives old‑fashioned fudge its fine, creamy grain instead of a sugary, gritty texture.
6. Pour and set
- As soon as the fudge thickens and just begins to hold its shape, quickly scrape it into the prepared pan and spread it evenly with a buttered spatula.
- If you’d like a look similar to your photo, sprinkle chocolate chips or chopped nuts over the top and press very lightly so they adhere.
- Let the fudge cool at room temperature until firm, 2–4 hours, or leave it overnight.
- Lift it out using the foil or parchment, place on a cutting board, and cut into small squares with a sharp knife.
Avoid refrigerating while it sets, as rapid cooling can sometimes promote a crumbly texture; room‑temperature setting is traditional for this style.
Continue to the next page to reveal more tips and tricks